Saturday, November 16, 2019

How to run HTTPS on spring boot with valid certificate

Port 80 should be open and free to use as Let's Encrypt runs a small http server behind the scene to prove whether you control your domain address (ACME protocol).
  1. You need to fetch the source code of Let's Encrypt on your server which your domain address is pointing to. This step may take a couple minutes.
    $ git clone https://github.com/certbot/certbot 
    $ cd certbot
    $ ./certbot-auto --help
    Remark: Python 2.7.8 (or above) should be installed beforehand.
  2. By executing following command in your terminal, Let's Encrypt generates certificates and a private key for you.
    $ ./certbot-auto certonly -a standalone \
         -d seeld.eu -d www.seeld.eu
    Keys are generated in /etc/letsencrypt/live/seeld.eu. Remark: 'certonly' - means that this command does not come with any special plugin like Apache or Nginx. 'standalone' -  means that Let's encrypt will automatically create a simple web server on port 80 to prove you control the domain.

How to Generate PKCS12 Files From PEM Files

Certificates and private keys are generated in 2 steps for free which shows the simplicity of Let's Encrypt. All of these generated materials are with PEM extension which is not supported in Spring Boot. Spring-Boot does not support PEM files generated by Let’s Encrypt. Spring Boot supports PKCS12 extension. Using OpenSSL, we convert our certificate and private key to PKCS12.
To convert the PEM files to PKCS12 version:
  1. Go to /etc/letsencrypt/live/seeld.eu
  2. We convert the keys to PKCS12 using OpenSSL in the terminal as follows.
    $ openssl pkcs12 -export -in fullchain.pem \ 
                     -inkey privkey.pem \ 
                     -out keystore.p12 
                     -name tomcat \
                     -CAfile chain.pem \
                     -caname root
The file 'keystore.p12' with PKCS12 is now generated in '/etc/letsencrypt/live/seeld.eu'.

Configuration of Your Spring Boot Application

Now we want to configure our Spring Boot application to benefit from the certificate and the private key; and eventually have the HTTPS thingy ready. At this moment, we already generated our certificate and private key. Then we converted the keys to PKCS12 extension which is ready to be used for a Spring application.
  1. Open your 'application.properties'
  2. Put this configuration there.
    server.port: 8443
    security.require-ssl=true
    server.ssl.key-store:/etc/letsencrypt/live/seeld.eu/keystore.p12
    server.ssl.key-store-password: <your-password>
    server.ssl.keyStoreType: PKCS12
    server.ssl.keyAlias: tomcat
    Remark'require-ssl' - means that your server only processes HTTPS-protected requests.
If you visit https://seeld.eu:8443, you can see that HTTPS is successfully configured and most importantly working. For the sake of our project, we did some additional steps to have HTTPS working with port 80, you can browse it with the https://seeld.eu URL.
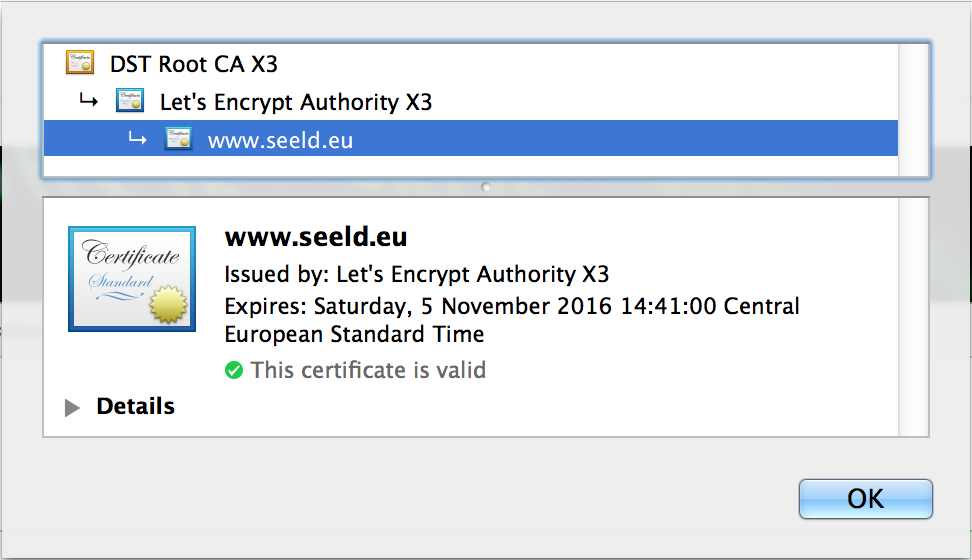
Seeld secured by Lets Encrypt

Renewal Process

Let's Encrypt certificates are only valid for 90 days. Some may say 3 months is too short comparing to validity period of certificates offered by other providers. They have two motivations for this strict decision: (1) limiting damage from key compromise or mis-issuance; (2) encouraging automation. So let's get started!
  1. Open your Let's Encrypt client directory, I mean the certbot. Remarks: On the same machine that certificates and keys are located. Please read all of the remarks from sections, such as having python installed, having port 80 open, etc.
  2. Run the renew command as follows.
  3. $ sudo ./certbot-auto renew
  4. 
    
    This command checks the expiry date of certificates located in this machine (managed by Let's Encrypt), and renew the ones that are either expired or about to expire.
We have new certificates, as simple as that!
As discussed in the section: Spring-Boot does not support PEM files generated by Let’s Encrypt. Spring Boot supports PKCS12 extension. Using OpenSSL, we convert our certificate and private key to PKCS12.

Preparation for Spring Boot

Let's create a PKCS#12 key store!
  1. Go to /etc/letsencrypt/live/seeld.eu
  2. We convert the keys to PKCS12 using OpenSSL in the terminal as follows.
    $ openssl pkcs12 -export -in fullchain.pem \ 
                     -inkey privkey.pem \ 
                     -out keystore.p12 
                     -name tomcat \
                     -CAfile chain.pem \
                     -caname root
The file ‘keystore.p12’ with PKCS12 is now generated in ‘/etc/letsencrypt/live/seeld.eu’.
But wait!
I assume the machine that you're woking on is the one with running Spring Boot. It means that we're not done yet! The previous ‘keystore.p12’ is still in the memory, meaning that you need to restart your application! 
It's not always viable to simply restart a running application. There might be other ways to update it without restarting but it's not in the scope of this post.

The Take-Home Message

In this post, we saw how to issuerenew a Let's Encrypt certificate, and most importantly, integrate it with Spring Boot. If you really don't unnecessarily play with configurations, it takes less than 5 minutes to have all things ready.
The main takeaway message for me is that Let's Encrypt makes (re-)issuing certificates incredibly faster, easier, and cheaper for everyone, no matter how many services you manage! You should start having HTTPS as soon as possible.

Sunday, September 1, 2019

how i solved the problem of .htaccess not working properly

here is solution for ubuntu and apache

First enable module rewrite:

sudo a2enmod rewrite 


And restart apache

sudo systemctl restart apache2

Now edit for directory level

sudo vim /etc/apache2/sites-enabled/000-default.conf

add these lines at end


    AllowOverride All


and restart apache again.

sudo service apache2 restart

Saturday, August 31, 2019

how I solved PHP Parse error: syntax error, unexpected end of file

Initially when I deployed my PHP code on ubuntu server, I asssumed whole PHP web application will work fine, but it was not.

I start getting this error PHP Parse error:  syntax error, unexpected end of file at Line 737.


After long introspection into code , executed following changes :


1. Open php.ini with nano in terminal


sudo nano /etc/php/php5.6/apache2/php.ini
2. Then change:

   short_open_tag = Off    to   short_open_tag = On


3.  Then save and then restart apache2:


  sudo systemctl restart apache2


4. Modify the .conf file


The first thing we must do is modify the main Apache 2 configuration file. To do this, open a terminal window and issue the command:


sudo nano /etc/apache2/apache2.conf


With apache2.conf open, all you have to do is add the following to the bottom of the file:


​SetHandler application/x-httpd-php


Save and close apache2.conf.


5. Enable/disable modules


In order to get PHP to function properly, you have to disable the mpm_event module and enable the mpm_prefork and php7 modules. To do this, go back to your terminal window and issue the command:


sudo a2dismod mpm_event && sudo a2enmod mpm_prefork && sudo a2enmod php7.0


6. Restart Apache 2


You're ready to restart Apache 2. Because we've disabled/enabled modules, we have to do a full restart of Apache 2 (instead of a reloading of the configuration files). To restart Apache, go back to the terminal window and issue the command:


sudo service apache2 restart


You should now be able to point a browser to a PHP file and watch it execute properly, as opposed to saving to your local drive or displaying code in your browser.


That's it—Apache 2 should be functioning exactly as you need.

Monday, March 21, 2016

Overriding equals And hashCode method in java

package com.bhoopendra.example;

public class Test { 
         private int num = 0;
         private String str = null; 
         Test(String str, int num) {
                   this.str = str; 
                  this.num = num; 
         }          
@Override         
 public boolean equals(Object obj) {
                   if (obj == this) { 
                            return true; 
                  }  
                 if (obj == null || obj.getClass() != this.getClass()) {
                             return false;
                   }                  
                Test obj2 = (Test) obj;
                   return (this.num == obj2.num && this.str.equals(obj2.str));
          }                  
 @Override    
   public int hashCode() { 
                   int hash = 7 ; 
                  int result = 31*hash + num; 
                  result = 31* result + (str ==null ?0: str.hashCode());
                   return result;                            
}

}

Lets take a simple class example.


Now let's take hashcode method first. As we all know that one has to override hashcode method along with equals method. The reason being simple .I am quoting Joshua Bloch . He says "

You must override hashCode in every class that overrides equals. Failure to do so will result in a violation of the general contract for Object.hashCode, which will prevent your class from functioning properly in conjunction with all hash-based collections, including HashMap, HashSet, and Hashtable."

Lets summarize the contract from Java specification :-

  • Whenever it is invoked on the same object more than once during an execution of an application, the hashcode method must consistently return the same integer, provided no information used in equals comparisons on the object is modified. This integer need not remain consistent from one execution of an application to another execution of the same application.
  • If two objects are equal according to the equals(Object) method, then calling
  • the hashcode method on each of the two objects must produce the same
    integer result.

    It is not required that if two objects are unequal according to the equals(Object)
    method, then calling the hashcode method on each of the two objects
    must produce distinct integer results. However, the programmer should be
    aware that producing distinct integer results for unequal objects may improve
    the performance of hash tables

    A good hash functions should return unequal hashcode for unequal objects. Ideally , a hash function should distribute  any reasonable collection of unequal instances uniformally across all possible values.

    Now lets analyze our hashcode finction for each line :

    @Override
        public int hashCode() {
    int hash = 7 ;
    int result = 31*hash + num;
    result = 31* result + (str ==null ?0: str.hashCode());
    return result;

    }

    Lets look at the line which is highlighted
      int hash =7;

    Idea behind using this non zero initialization is to affect hashvalue which would have rather unaffected any or all of the subsequent steps after this step and before returning any value have result in zero. Surely , more common hashcode values. Hence it would increase the chance of hash code collision. You  could have taken 7 or 17. I would prefer prime number here.  Now let's come to mutliplication factor . why 31 ? and why no 2, 4 ,6 10 etc.  31 is chosen because it is an odd prime.If it were even and the multiplication overflowed, the information would be lost, as multiplication by 2 is equivalent  to shifting. Advantage of using 31 is less clear, but it is done traditionally. A nice property of 31 is that multiplication can be replaced by shift and subtraction for better performance.

                 31*i =  i << 5 -i;
    Modern VMs do this sort of optimisation automatically.

    Now, I am presenting here some tips to write hashcode method which uses different types of data types.

    Step-1 : Store some non zero constant value in some variable say, result.
       e.g              int result = 17;

    Step-2 : For each significant field  f ( all those attributes which you want to take into account ) in your object compute hash code.
     2.a. If f  is boolean
           result += 31 * (f ?1:0) + result;
     2.b. If  f is  byte, char, short or int , compute (int) f;
            result  += 31 * ((int) f);
     2.c. If f is long, compute (int ) (f ^(f >>>32));
            result += 31 *  (int ) (f ^(f >>>32));
     2.d. If  is float , compute  Float.floatToIntBits(f)
            result += 31 *  Float.floatToIntBits(f);
    2.e. If f is double , compute Double.doubleToLongBits(f) and then hash the resulting long                       according to step 2.c
               long x =  Double.doubleToLongBits(f);
               result += 31 *  (int ) (x^(x>>>32));
    2.f. If field is an array, treat it as if each element were a separate field and then compute hash code of       each element by applying above rules recursively. Either way one can also use Arrays.hashcode           method.

    2.g. If the field is an object reference and this class’s equals method compares the field by recursively        invoking equals, recursively invoke   on the field. If a more complex comparison is required,              compute a “canonical representation” for this field and invoke hashCode on the canonical
           representation. If the value of the field is null, return 0 (or some other constant, but 0 is                        traditional).

    To summarize above result, have a look at the sample class written. which takes into account all above rules/tips.


    package com.bhoopendra.examples;

    public class Test {
       
           private int num = 0;
           private String str = null;
           private long longField= 7L;
           private float salary = 200.56f;
           private boolean isManager = false;
           private Object myObj = new Object();
           private short teamsize = 7;
           private char sex = 'M';
           private double ppfMoney = 30000000000d;

           Test(String str, int num) {
                  this.str = str;
                  this.num = num;
           }

           @Override
           public int hashCode() {
                  final int prime = 31;
                  int result = 1;
                  result = prime * result + (isManager ? 1231 : 1237);
                  result = prime * result + (int) (longField ^ (longField >>> 32));
                  result = prime * result + ((myObj == null) ? 0 : myObj.hashCode());
                  result = prime * result + num;
                  long temp;
                  temp = Double.doubleToLongBits(ppfMoney);
                  result = prime * result + (int) (temp ^ (temp >>> 32));
                  result = prime * result + Float.floatToIntBits(salary);
                  result = prime * result + sex;
                  result = prime * result + ((str == null) ? 0 : str.hashCode());
                  result = prime * result + teamsize;
                  return result;
           }

           @Override
           public boolean equals(Object obj) {
                  if (this == obj)
                         return true;
                  if (obj == null)
                         return false;
                  if (getClass() != obj.getClass())
                         return false;
                  Test other = (Test) obj;
                  if (isManager != other.isManager)
                         return false;
                  if (longField != other.longField)
                         return false;
                  if (myObj == null) {
                         if (other.myObj != null)
                               return false;
                  } else if (!myObj.equals(other.myObj))
                         return false;
                  if (num != other.num)
                         return false;
                  if (Double.doubleToLongBits(ppfMoney) != Double.doubleToLongBits(other.ppfMoney))
                         return false;
                  if (Float.floatToIntBits(salary) != Float.floatToIntBits(other.salary))
                         return false;
                  if (sex != other.sex)
                         return false;
                  if (str == null) {
                         if (other.str != null)
                               return false;
                  } else if (!str.equals(other.str))
                         return false;
                  if (teamsize != other.teamsize)
                         return false;
                  return true;
           }  
       
    }


    Saturday, June 21, 2014

    Memcached installation on windows and unix based system

    Memcached is free and open source, high performance distributed memory object caching system, generic in nature, but intended  for use in speeding up dynamic web applications by alleviating database load.
    Memcached is an in-memory key value store for small chunks of arbitrary data storage (strings, objects) from results of database calls, API calls, or for page rendering. Memcached is simple yet powerful. Its simple design promotes quick deployment, ease of deployment and solves many problems facing large data caches. Its API is available for most popular languages.
    Memcache installation on windows  
    One can download  memcache zip  from here for 64 bit version and  here for 32 bit version .
    You can unzip the folder and paste at suitable place in your computer. For installation , you can run following command :
    memcached.exe –d install
    memcached.exe –d start

    When you open your task manager, you can watch this memcached service running in your computer.


    Congratulations! J  you have installed memcached in your system.

    Memcached installation on Unix based system.

        1. Lets walk through some steps and commands on unix based system
                  Download link : http://www.memcached.org/files/memcached-1.4.20.tar.gz

    1.                           To start memcache on unix :
    shell> memcached
     or sh memcached.sh

    2.         By default, memcached uses the following settings:
    ·         Memory allocation of 64MB
    ·         Listens for connections on all network interfaces, using port 11211
    ·         Supports a maximum of 1024 simultaneous connections.

    Typically, you would specify the full combination of options that you want when starting memcached, and normally provide a startup script to handle the initialization of memcached.For example, the following line starts memcached with a maximum of 1024MB RAM for the cache,listening on port 11211 on the IP address 192.168.0.110, running as a background daemon:
    shell> memcached -d -m 1024 -p 11211 -l 192.168.0.110

           3.       -l interface
    Specify a network interface/address to listen for connections. The default is to listen on all available address (INADDR_ANY).
    shell> memcached -l 192.168.0.110
    Support for IPv6 address support was added in memcached 1.2.5.
    -p port
    Specify the TCP port to use for connections. Default is 18080.
    shell> memcached -p 18080


    4. If you start memcached as root, use the -u option to specify the user for executing memcached:

    shell> memcached -u memcache

    You can use the output of the vmstat command to get the free memory, as shown in free column:

    shell> vmstat


    5. -c connections

    Specify the maximum number of simultaneous connections to the memcached service. The default is 1024.

    shell> memcached -c 2048

    6. -t threads

    Specify the number of threads to use when processing incoming requests.

    By default, memcached is configured to use 4 concurrent threads. The threading improves the performance of storing and retrieving data in the cache, using a locking system to prevent different threads overwriting or updating the same values. To increase or decrease the number of threads, use the -t option:

    shell> memcached -t 8

    7-d

    Run memcached as a daemon (background) process:

    shell> memcached -d
    8 -r

    Maximize the size of the core file limit. In the event of a failure, this attempts to dump the entire memory space to disk as a core file, up to any limits imposed by setrlimit.

    9.-M

    Return an error to the client when the memory has been exhausted. This replaces the normal behavior of removing older items from the cache to make way for new items.

    10.-k

    Lock down all paged memory. This reserves the memory before use, instead of allocating new slabs of memory as new items are stored in the cache.

    Note
    There is a user-level limit on how much memory you can lock. Trying to allocate more than the available memory fails. You can set the limit for the user you started the daemon with (not for the -u user user) within the shell by using ulimit -S -l NUM_KB

    11.-v

    Verbose mode. Prints errors and warnings while executing the main event loop.

    12.-vv

    Very verbose mode. In addition to information printed by -v, also prints each client command and the response.
    13.
    -vvv

    Extremely verbose mode. In addition to information printed by -vv, also show the internal state transitions.

    14.-h

    Print the help message and exit.

    15.-i

    Print the memcached and libevent license.

    16.-I mem

    Specify the maximum size permitted for storing an object within the memcached instance. The size supports a unit postfix (k for kilobytes, m for megabytes). For example, to increase the maximum supported object size to 32MB:

    shell> memcached -I 32m
    The maximum object size you can specify is 128MB, the default remains at 1MB.

    This option was added in 1.4.2.

    17.-b

    Set the backlog queue limit. The backlog queue configures how many network connections can be waiting to be processed by memcached. Increasing this limit may reduce errors received by the client that it is not able to connect to the memcached instance, but does not improve the performance of the server. The default is 1024.

    18.-P pidfile

    Save the process ID of the memcached instance into file.

    19.-f

    Set the chunk size growth factor. When allocating new memory chunks, the allocated size of new chunks is determined by multiplying the default slab size by this factor.

    To see the effects of this option without extensive testing, use the -vv command-line option to show the calculated slab sizes. For more information, see Section 15.6.2.8, “memcached Logs”.

    20.-n bytes

    The minimum space allocated for the key+value+flags information. The default is 48 bytes.

    21.-L

    On systems that support large memory pages, enables large memory page use. Using large memory pages enables memcached to allocate the item cache in one large chunk, which can improve the performance by reducing the number misses when accessing memory.

    22.-C

    Disable the use of compare and swap (CAS) operations.

    This option was added in memcached 1.3.x.

    23.-D char

    Set the default character to be used as a delimiter between the key prefixes and IDs. This is used for the per-prefix statistics reporting (see Section 15.6.4, “Getting memcached Statistics”). The default is the colon (:). If this option is used, statistics collection is turned on automatically. If not used, you can enable stats collection by sending the stats detail on command to the server.

    This option was added in memcached 1.3.x.

    24.-R num

    Sets the maximum number of requests per event process. The default is 20.

    25.-B protocol

    Set the binding protocol, that is, the default memcached protocol support for client connections. Options are ascii, binary or auto. Automatic (auto) is the default.

    This option was added in memcached 1.4.0.

    Lets finish configuration related talks here and move to some hard core java programming  for availaing caching.