Friday, June 14, 2024

Google cloud skill boost program

Continue your gen AI learning journey with Google Cloud Skills Boost. We recommend the following resources: 

Intermediate: Gemini for Cloud
Advanced: Gen AI for Developers  Learning Path
Gen AI Use Cases in Customer Service, Content Discovery, Catalog Enhancement
Google Cloud Gen AI Repository

Sunday, January 28, 2024

ScyllaDB error: You have to be logged in and not anonymous to perform this request


Sometimes  you encountered a error in scylladb - "You have to be logged in and not anonymous to perform this request"


cassandra@cqlsh> GRANT SELECT ON myKeybase.test TO testuser;

Unauthorized: Error from server: code=2100 [Unauthorized] message="You have to be logged in and not anonymous to perform this request"

cassandra@cqlsh>


1 Find and open 'cassandra.yaml' file on your computer.


2 Find and delete 'authenticator: AllowAllAuthenticator' in the file.


3 Replace it with 'authenticator: PasswordAuthenticator'


4 Also, add this line : 'authorizer: CassandraAuthorizer '


Restart Cassandra. 

Tuesday, December 12, 2023

Deploying Spring Boot application on K8S

 Introduction

In this article, we will be deploying a Java Spring Boot Application on Kubernetes.
Here’s a high-level overview of the process of deploying a Spring Boot application on Kubernetes:

  1. Containerize the Spring Boot Application
  2. Create Kubernetes Deployment
  3. Define Kubernetes Services
  4. Deploy the Application to Kubernetes Cluster

Setups:

GitHub Repo for source code:

https://github.com/HARSHALJETHWA19/springboot-k8s.git

Setup :
Launch an instance from an Amazon Linux 2 or Amazon Linux AMI
with t2.medium

2. Connect to your instance.

3. Update the packages and package caches you have installed on

your instance.

yum update -y

Docker Service :

yum install docker -y
docker -v

Start the Docker service

systemctl start docker
systemctl enable docker

Install Conntrack and git:

yum install conntrack -y
yum install git -y

Install Kubernetes(k8) :

curl -LO
https://storage.googleapis.com/minikube/releases/latest/minikubelinux-
amd64
sudo install minikube-linux-amd64 /usr/local/bin/minikube

Start Minikube :

minikube start --force --driver=docker
minikube version

Install kubectl :

sudo curl -LO "https://dl.k8s.io/release/$(curl -s https://storage.googleapis.com/kubernetes-release/release/stable.txt)/bin/linux/amd64/kubectl"
sudo chmod +x kubectl
sudo mv kubectl /usr/local/bin/

Clone the repo :

cd /opt/
git clone https://github.com/HARSHALJETHWA19/springboot-k8s.git

Make the Database UP:

cd springboot-k8s
kubectl create -f db-deployment.yaml
kubectl get pods
kubectl exec -it mysql-79554598b8-rqzj8 -- /bin/bash
mysql -u root -p root
show databases;

Maven Install :

yum install maven -y

Create the docker image :

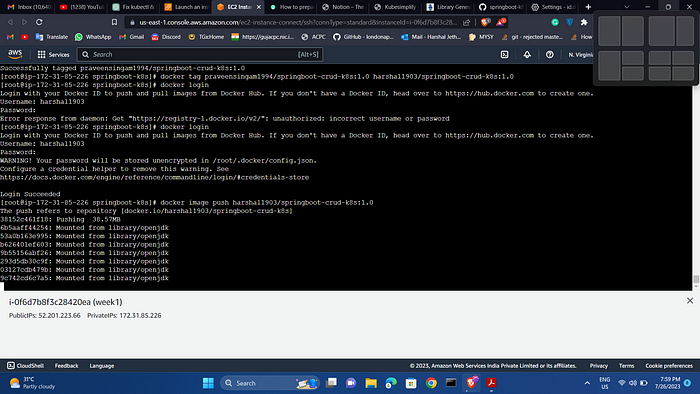
docker build -t harshal1903/springboot-crud-k8s:1.0 .
docker login
[ CREATE A DOCKER HUB ACCOUNT BEFORE ]
Give dockerhub username and password

docker image push harshal1903/springboot-crud-k8s:1.0
kubectl apply -f app-deployment.yaml
kubectl get svc
minikube ip
PUT PORT FORWARD :

kubectl port-forward --address 0.0.0.0 svc/springbootcrud-
svc 8080:8080 &

[HOST PORT TO CONTAINER PORT]\

kubectl port-forward --address 0.0.0.0 svc/{your service name}
{external port to the Internet}:{your service port, the port your app is
listening on in it's container}

for example, if my service is named store and is listening on 80

kubectl port-forward --address 0.0.0.0 svc/store 8888:80

JSON DATA TO BE HITTED WITH POST :

URL POST — http://<EC2IP>:8080/orders
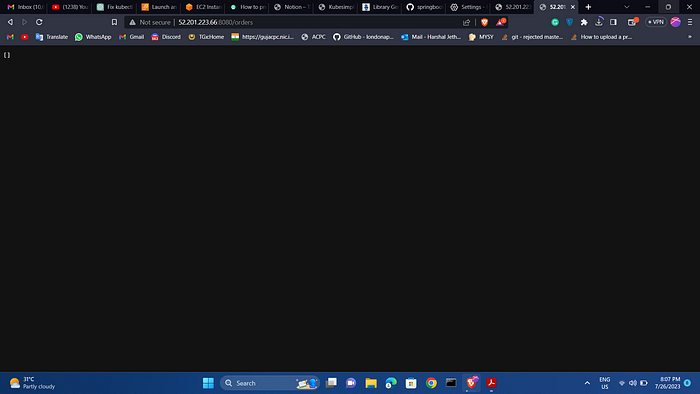
Check Database

URL GET — http://<EC2IP>:8080/orders/1

FOR DASHBOARD:

/usr/local/bin/kubectl proxy — address=’0.0.0.0' — accept-hosts=’^*$’

IN OTHER TERMINAL

minikube dashboard

20 — Hit this url in browser

http://<EC2IP>:8001/api/v1/namespaces/kubernetesdashboard/

services/http:kubernetesdashboard:/

proxy/#/pod?namespace=default

Sunday, August 14, 2022

Solutions to no zip found in git bash

 Solutions to no zip found in git bash


Navigate to this sourceforge page https://sourceforge.net/projects/gnuwin32/files/zip/3.0/


Download zip-3.0-bin.zip

In the zipped file, in the bin folder, find the file zip.exe.

Extract the file zip.exe to your mingw64 bin folder (for me: C:\Program Files\Git\mingw64\bin)

Navigate to to this SourceForge page

 https://sourceforge.net/projects/gnuwin32/files/bzip2/1.0.5/


Download bzip2-1.0.5-bin.zip

In the zipped file, in the bin folder, find the file bzip2.dll

Extract bzip2.dll to your mingw64\bin folder (same folder as above: C:\Program Files\Git\mingw64\bin)

Sunday, December 5, 2021

Renewing Lets encrypt certficate.

How to forcefully renew Let’s Encrypt certificate

In Linux and Unix, there are multiple ways to issue and renew the Letsencrypt TLS/SSL certificates. However, in this tutorial, we are going to use the two most popular command-line tools that you can use:


We can always force cert renewal even if it is not near its expiration date.

certbot – Request a new certificate using 

certbot renew --force-renewal command. 


We can specify domains using the -d option. For example, certbot -d cyberciti.biz,www.cyberciti.biz,test.cyberciti.biz --force-renewal

acme.sh – Force to renew a cert immediately using the acme.sh -f -r -d www.cyberciti.biz


Sunday, November 28, 2021

Deploying angular ssr application

 Step -1: Build the angular application using following command

                  npm run build:ssr


Step-2 : transfer the dist folder to home/ubuntu/

Step-3 : kill pm2 using following command

pm2 kill

Step-4 : restart main.js using following command

 pm2 start dist/india-camps-web/server/main.js

other useful commands

  •    systemctl restart nginx
  •    sudo nginx -t
  •    sudo systemctl reload nginx
  •    sudo systemctl restart nginx
  •    sudo systemctl status nginx
  •    pm2 list
  •    pm2 kill


Wednesday, September 1, 2021

How to automatically renew letsencrypt certficate

 Run the following line, which will add a cron job to /etc/crontab:


SLEEPTIME=$(awk 'BEGIN{srand(); print int(rand()*(3600+1))}'); echo "0 0,12 * * * root sleep $SLEEPTIME && certbot renew -q" | sudo tee -a /etc/crontab > /dev/null


If you needed to stop your webserver to run Certbot, you’ll want to add pre and post hooks to stop and start your webserver automatically. For example, if your webserver is HAProxy, run the following commands to create the hook files in the appropriate directory:


sudo sh -c 'printf "#!/bin/sh\nservice haproxy stop\n" > /etc/letsencrypt/renewal-hooks/pre/haproxy.sh'

sudo sh -c 'printf "#!/bin/sh\nservice haproxy start\n" > /etc/letsencrypt/renewal-hooks/post/haproxy.sh'

sudo chmod 755 /etc/letsencrypt/renewal-hooks/pre/haproxy.sh

sudo chmod 755 /etc/letsencrypt/renewal-hooks/post/haproxy.sh


Congratulations, Certbot will now automatically renew your certificates in the background.


If you are interested in learning more about how Certbot renews your certificates, see the Renewing certificates section above.